Monday, June 30, 2008

The White is a Lie!

Primavera Victoriana


All throughout my childhood I bought into the lie. White is the basic color of underwear, the color you should have the most of, the smart choice. White was the basic color of bras and you should have mostly white bras and a black one for those mysteriously see-through black tops. But I tell you all today that that is a lie. Nude should be your color of choice for underwear.

I'm tired of being lied to and coerced into buying white panties and bras. Panties only come in packs of white or multi-colored/patterned ones. While I love a pair of orange knickers as much as the next girl, but some garments just require something else. That something else is nude.

Why nude instead of white? White shows conspicuously through even light colored garments, making it about as good as a colored or patterned pair. I'd rather have a fun color or pattern than a plain white bra or panties, especially since the colors can avoid that dinginess particular to older whites. Nude underwear blends in with your skintone better, thus being good under anything. They avoid dinginess and fading the best out of any color you can get your unmentionables in. You can even toss the black bra. Nude is the only color you need. So why are they not available in packs?

In this, the current world, where fabrics are at their cheapest and thinnest, nude is a girl's best friend.

All we need is nude,
Ivy Frozen

Paid for by the lobby of fashion rebels for packs of cheap, nude underwear.


Read more!

Thursday, June 26, 2008

PSA:

hair

We interrupt your regular programming to bring you this special announcement.


Swan Lake

Just

Spring
Say

gladiola
Yes!

To the Batmobile
to

Art Noveau Bird
Ankle Socks

For the World's Future Nyah!
Particularly lovely with sandals.
They're also very good with shoes made from synthetic materials as they absorb sweat. Thick socks can help make some shoes fit better. And of course, they're just adorable. Play with scrunching them to avoid shortening your legs in a way you don't like.

Thank you,

Ivy Frozen

Read more!

Wednesday, June 25, 2008

Preview

pretty dresses


One Week...

Stay tuned,
Ivy Frozen


Read more!

Tuesday, June 24, 2008

Adventures in Consumerism: The Search for High Waisted Denim Shorts

Dive in

Back in the 90s, I was all about low rise. Since I have wide hips and a small waist, the cut of earlier 90s jeans tended to be uncomfortable and rub my hipbones the wrong way, since they didn't really fit me right. Remember, I'd be shopping in the kids and juniors departments which just weren't as curvy as my body was. But then, glory of glories, came the hiphuggers. Since they ended at the hips, they fit me better and how I rejoiced. If only I could do something to avoid the dreaded undie flash when I bent over. Thus, I wore belts, which kept my pants up, but crushed my poor hipbones.

Some time after that, I rediscovered my girly roots and took to dresses and skirts. Some rocket scientist discovered that many women have larger hips than waists and invented the curvy fit jean. I got into street fashion sites and fashion blogs and realized that high waists ruled and looked fabulous on me, emphasizing two of my favorite limbs as well as my waist. I've always liked shorter shorts on me, so I was thrilled when high waisted shorts walked back down the runways, like what, two years ago? And now, I find myself in search of the perfect pair for a gal for whom $100 does not equal affordable. Covetable. Take a look at the pricetag and run for it. But not, affordable. Unfortunately, it seems the cheap chic options in denim tend to compansate for more fabric on top with less on the bottom. Click read more to take a look at some specimens.
In Surburbia, it seems the point of wearing high waisted shorts is so that you can show bottom booty cleavage.

While they're beside the point, I couldn't resist the wetsuit diving stripper shorts offered by American Apparel. The highwaisted denim shorts aren't much better; most of them declined to state their inseams which are no doubt one inch or less. And I find myself rather intrigued with the ones that feature "Dog" written in colorful letters across your top bum cleavage.

This styles look more promising:


though even some of them are too short on the bottom for my taste.

Solutions? My current favorite pair of shorts started their life like this:

Spring

But then I opened up the cuff (and removed the stay stitching) for this:

Testing the water

Unfortunately, it seems my local mall is foiling my plans further by not having cuffs on their jean shorts for me to open or the shape of the shorts won't look good with an open cuff. I think I have some denim left over from my wide legged sailor trouser jeans that hopefully will be enough to make my own high waisted denim shorts. Take that, stores!

DIY spoils,
Ivy Frozen


Read more!

Thursday, June 19, 2008

Vogue Italia's July 2008 Issue

I've always loved Vogue Italia and Steven Meisel, since I discovered them about a year ago anyways. Vogue Italia appealed to me much more than American Vogue, and Mr. Meisel's Vogue Patterns shoot was amazing. It was that editorial that led me to both of them. Imagine my joy this afternoon to discover on Bunnyshop that Vogue Italia is planning an issue using all black models in a reversal of the usual practice of all caucasian models.

My love for Vogue Italia and Mr. Meisel only grew when I read the source article in the Times. Not only will it feature black models, but "plus size"* as well. Toccara from America's Next Top Model is also slated to appear in it. Looks like I will be counting my pennies to pick up this issue in the states. Maybe that'll prove that black models will sell things.


I think smoking is one of the worst things someone can do, but that photo at the top is just so cool, so I will forgive the cigarette. It was for the picture. I love all the images on the fold out cover in the second image on this page. And the last image has this funky city princess feel to it that I have random love for it. Or, it could just be about those shoes, shown off so well with the black tights.

*I put plus size in quotes since the Fashion Industry's plus size differs from my idea of it.

Images from Times Online

BTW, beware Floridians. There's a Sexual predator that goes by the name of Steven Jason Meizel that I found while trying to find that tatooed ladies shoot of Meisel's. Apparently, he also sometimes goes by Steven Meisel.

Buying July's Italian Vogue,

Ivy Frozen


Read more!

Wednesday, June 18, 2008

Jumpsuits, Rompers, and the Criminal Fringe

Pin-Up Mouse


I was never a fan of rompers. Bad memories of a one piece swimsuit and attempting to use the restroom with the suit wet affected my opinion of rompers more than a little bit. And the popular 70s inspired terry cloth versions did nothing but further my negative opinion of them. But then, one day, I saw an amazing sight: the lovely Sherbert Tone in a 60s playsuit. A seed was planted that day.

It matured into a fully grown tree when I wore the outfit in the picture last year around this time. It visually might as well be a romper, with the top and shorts being close enough to the same color. By the way, that's a lovely option if a) you like rompers or b) you don't want to buy a romper c) you can't buy a romper d) you're too haunted by a public bathroom experience involving and arguably caused by a onepiece e) any combination of the above reasons. It should be noted that romper is to a matching top and shorts as a dress is to a shirt and skirt combo. In other words, a romper will lie smoother with less wrinkling than a shirt and shorts combo.


rompers

The above are some rompers I have planned, hopefully with belts too. I'm working on the blue floral one right now, and I'm almost finished with it. It's made from some thrifted capris with an amazing print. Let's hope it turns out well. The green stripey one is still only an idea on my to do list and will be made from some old sheets. Keep an eye out for both of them.

Just playsuiting around,
Ivy Frozen


Read more!

Tuesday, June 17, 2008

Inspiration: Can-Can

Today's inspiration is the 1960 movie of the musical Can-Can, starring Frank Sinatra and Shirley MacLaine. Reviewers slammed it since it seems the actors don't relate well to each other. I'll admit my favorite part of this movie are the musical numbers-- particularly the Adam and Eve ballet-- and the costumes. It was nominated for best costumes and best musical score academy awards.

orange one shouldered dress

I love Shirley MacLaine's one shouldered dresses. One shouldered dresses are a little trendy now, and I've never been a big fan of them. They either have a modern/art deco/80s feel or a Grecian feel to them and always have a very thick strap. The thin, decorative straps of Shirley MacLaine's dresses and the split bust attract me. I've already got a recon of some Indian pants planned to include those details, so be on the lookout for that.

I'm also in love with all the ruffles inside the can can skirts, although I won't be building one of those anytime soon. I also noticed the knots on top of the Can-Can dancers' heads. They remind me of the lazy knots seen in modern times on girls who rolled out of bed in their pjs and go to class.

I always find it interesting how I can date period films by the hair, and sometimes the costumes. In Can-Can, the volumous coifs point to the the 1960s, along with some of MacLaine's dresses which had a 1960s drape to them, even though it was supposed to be depicting 1886. I also watched Victor/Victoria recently, starring Julie Andrews, and I could date the film to the 80s by some of the cast's distinctly 80s hair. I can't entirly decide whether I like this or not. On one hand, it seems a little sloppy. I would love to see more historical accurency in films, or even just locational. In Can-Can despite it's Paris setting, MacLaine and Sinatra don't even try for French accents, leaving me to think they were Americans in Paris, especially when contrasted with Louis Jourdan who actually did have one. However, these are musicals. Historical accurency might not work out so well, and musicals are primarily designed to have shiny costumes and entertain, which these films do. Also, the hair does help me date the films. What do you think?

Pondering life's inaccuracies,
Ivy Frozen


Read more!

Monday, June 16, 2008

Product Review: Marshall's Megashoeshop

edge of my seat


With the current slump in sales in the retail biz, a lot of stores are stepping up their game. Old Navy started offering more fashion forward pieces and even Walmart has started stocking some decent clothes. Marshalls has got in the game by totally re-doing their shoe department. They're also embracing the new technologies and fashion bloggers. While I'm all for that, can their product hold up to our scrutiny? Click the read more link to find out whether Marshalls is worth another look.

I decided to check out my local Marshalls, because if they could improve the shoe department in that one, well, then it might actually have a shoe department. I did sacrifice getting to see a man-- who rides around in a giant red stiletto-- wearing a pink shirt that reads "Am I your sole mate?" while carrying around a silver platter to serve shoes to the ladies. Overt smiling expected. I would have had to trek out to San Francisco to see that though. So, let's deal with what I did see.


The new shoe department featured trendy shoes by recognizable names. The shoes are now organized by style, instead of size, and contain various sizes in their boxes stacked below the sample shoe, just like DSW. And in my local one, they even had an ugly--er--plain, comfortable shoe section to serve the more conservative among us. I would say that anyone could find at least one shoe they liked there. It appears that they have a fairly fast turnaover rate, since I located most of the shoes in the photo above in the clearance sections. There was a nice range in the prices and in the brands, including a few higher end brands and a lot of mid-range ones. They claimed to have halved the prices on every shoe I picked up. And despite it's relatively large size, I found the department to be a little bit crowded, suggesting approval from my fellow shoppers.

The verdict: Ivy Frozen gives Marshalls Megashoeshop 8 ivy leaves out of 10. While it is a vast improvement from the ghost town of a previous shoe section, it wasn't upped enough to be my goto spot for shoes, though I'll certainly keep them in mind. Also, bear in mind the store I visited would be the bottom of the line, so there megashop can only be better. I will make the journey to a better store later and see if I must up their score. In the mean time, I would say it's worth it to take a look at Marshalls yourself. I picked up the outfit above on my trip there, except for the socks. I'm really pleased they made the tunic long enough to be a dress without fear of the chocha showing. The shoes are Report from their new shoe section, and I'm convinced that if the Wizard of Oz took place in this modern time that the ruby red slippers would look something like these flats.

Kansas chair stand 2


If you've got gaming skills, playing this little game could win you a free $250 dollar gift certificate! Totally worth it for less than a minute of play time. It's a matching type game, where you have to match the shoe's silhouette to the shoe. Sounds simple right? They toughen it up by not having all the shoes visible at once. You have to scroll around the store to find them. It could keep you occupied for a while.

As for the gift certificate, they hand one out every two weeks to the person who completes all three rounds of this game the fastest. Get those fingers moving for free stuff.


On the edge of my seat,
Ivy Frozen


Read more!

Friday, June 13, 2008

How to Successfully Alter Clothing pt5: A Tutorial!

modern romance sleep with me tonight

The fifth part of this series is a tutorial! This tutorial doesn't actually alter a garment, but a sheet. Nevertheless, it should illustrate some of the concepts I presented in the previous parts of this series. Insert all the usual stuff use agreements about not using my dress design to make yourself money, or taking credit for it, blah, blah. Agree? Click the read more link!
Unfortunately, my video is on Veoh! and Veoh recently stopped service to a bunch of countries, including: Lebanon, United Arab Emirates, Malaysia, Indonesia, Chile, Argentina, St. Kitts and Nevis, Guatemala, Luxembourg, Costa Rica, Dominican Republic, Venezuela, Brazil, Puerto Rico, Guam, Jamaica, Barbados, El Salvador, Hungary, Malta, Macedonia, Slovenia, Slovakia, Ukraine, Colombia, Cyprus, Romania, the Cayman Islands, Guadeloupe, Saudi Arabia, Peru, Panama, Czech Republic, Turkey, Croatia, Lithuania, Jordan, Egypt, Bulgaria, Serbia, Iceland, Bermuda, Thailand, Brunei, Honduras, Bahamas, and Nicaragua. (Information from My Soju, where I find my Asian drama series and movies.) Why, I do not know, but I will try to transcribe my video into a written tutorial for those of you effected by this. It will also be good for those of you who prefer written instructions to a video. Look out for How to Successfully Alter clothing pt5 pt2. For the rest of you, enjoy the tutorial.


The bubble dress in the tutorial has a fuller skirt than my other ones:

seashore the ring

The width of the skirt on these bubble dresses is four inches above my hip measurement. This dress is also the strap variation of the dress, so you can see the ruffles used as straps.

Working on that written tutorial, really!
Ivy Frozen


Read more!

Wednesday, June 11, 2008

How to Successfully Alter Clothing pt4: Sewing

Birds of a Feather collage

You've figured out what you're going to do, picked up your supplies, and made your cuts. Now you're ready to start sewing! Now, I can't tell you everything about sewing; books have been written on the subject and this blog post could hardly compare. But, I will include some hints and tricks that you might not find in other sources. Check out my diy links collection for online sources to help you with your sewing.

If you're new to sewing, avoid topstitiching. Topstitching is just stitches that show on the outside of your garment. If you're new to sewing, your stitching lines likely won't be straight, and that will make your recon look messy. You might consider using dissapearing ink pens to mark your stitching lines and help guide you in a straight line. There are also these neat magnetic seam guides that you can buy at your local sewing store that you can stick on your machine and since it's raised, it will help you stitch a straight line.

Don't forget to finish your seams! Here's an article from Sew, Mama, Sew! that covers seam finishes. Seam finishes may seem annoying--particularly if you don't have a serger-- but if you love your garment and don't love fraying edges, seam finishes are a must.

Put your pins in a 90 degree angle to your sewing line. This allows you to sew over your pins.

You taste test food when you prepare it, do the same for your garment. Test the fit at various stages. I hold pieces up, and pin them together on me to ensure it will fit. Test the fit anytime you can. It will mean you have to take out less stitching if something's amiss.

If you're having issues with your machine, i.e. everytime you try to stitch, the thread goes all heywire and your machine makes grumpy noises, you may just be guiding your fabric a little too much. Back off and let your machine do the work. Keep your touch light and just keep the fabric straight; let your machine's feed dogs carry the fabric through the machine. Also, if your thread messes up, it's a good idea to rethread the top thread and take out and replace your bobbin regardless of which of the two seemed to have the issue. It may seem annoying, but it's not as annoying as having to take out wonky stitching again because your machine is still grumpy. As a side note, having automatic threader on your machine is totally worth it.

If you don't have a sewing machine, you're not out of luck. Coats and Clark covers the basic handstitches here. The backstitch is what you're going to want to use for most seams. Those with machines may also like the inside blind stitch or invisible cross-stitch covered in the article, which are good for hems.

Feel free to post questions and more tips below. You can also check out my diy links list for more online sources for sewing information and sewing communities filled with people who know more about sewing than I do.

Sewing up a storm,
Ivy Frozen


Read more!

Diy Link Love

Tomoyo

Updated- June 12th 2008. Originally Post from my old blog '07

Now that Halloween's over, I figured I'd post a lot of cool DIY (do it yourself) sites I found. I know, too late to help with your costume this year, but the links include a plethora of DIY projects that can be used for daily wear, Christmas pressies, any other events you'd love to wear a costume too, and maybe just give ya something to do rainy/snowy/I just don't feel like going outside weather.

Note that all of the sites, regardless of category, offer projects or tutorials of some kind. At least, I'm pretty sure.

Tomoyo awkward

If you like that site I posted about before, with those demon-deal inducing dresses, you might be interested in some of the following historically accurate reproduction sites I found.

Modar University has a few tutorials on Medeival Clothes, but it's real strength is ALL THE LINKS. I haven't had time to explore them all, but how could something Medeival Russian clothing tutorials and Persian clothing patterns not be awesome? Join me in nerdy revelry! I drool, I drool! Scroll down ont he page and click on "Clothing" to find this treasure trove.

The DIY Guide to LRP has some great stuff to use for costuming projects and if you're bold, to wear eveyday. Unfortunately, a lot of the links aren't working and it places the tutorials uin the tiny sidebar. Maybe if you download the link...

Shira.net Belly Dancing Costumes page has some great tutorials and advice for costumes and everyday for the bold. I've been aching for a pair of full harem pants ever since I saw Aladdin when i was a little girl. I've got that project, from Ask the Costume Goddess, bookmarked for me to complete when I find some good fabric. And maybe I'll try some of the skirts, a veil, headress...

Dance and Shantall is another bellydancing costume site. Click on costume design for a few cool tutorials. What I really love is the guide on making the Turkish-Macedonian vest. I fell in love with it in Art history class and must now make one. Duly noted for self.

Katherine's Dress Site goes from the 18th century to the Edwardian period. Lots of inspirational eye candy, including fashion plates!, and some patterns. It includes instructions for making the items both the period way and the modern way. How awesome is that? Also check out Katherine's costumes. A+ from me.

Vintage sewing. info offers "offers free online access to public domain sewing books". Gotta love the advice in those old books. It offers information 1893 to the 1950s.

Sensibility.com has some awesome period costume patterns and tutorials. Check them out! I might try the Romantic era dress but make it shorter.

Tudor links! has a wealth of information on the Elizabethan Tudor period. Click on Textiles and Costumes for enough information to fill the historical clothing nerd within you with glee and keep you reading for several hours. The Ladies Treasury , somewhere connected to this site thoguh I can't find the right sequence of links to follow, offers these free Victorian/Eduardian patterns too, as well as articles on Victorian & Eduardian period dress. More drooling!

Check out this Custum Corset Pattern generator for Elizabethan style corsets meant to flatten the chest and not narrow your waist. So it's different from the more Victorian corsets that are popular. The wide skirt in Elizabethan dress makes the waist look smaller in comparison. It gives you a pattern and instructions.

The Costumer's Guide to Movie Costumes offers images of fantasy and period costumes from movies and television. There is also some discussion on making of the pieces and links to costume designers discussing their costumes. It also keeps me up to date on new fantasy and period films coming out.

Twinkle sleeping 1


If you love modern free patterns and tutorials, clap your hands. *clap, clap*

DaciaRay.com is a visually stimulating blog with a few fun tutorials to try out, like a yo-yo, wallet, and pear satchel. The lovely DaciaRay also has a useful tutorial on how to hem jeans. Worth a looksie.

Whatthecraft is one of my favorite places for tutorials. I use several of them regularly, although now I know them by heart. There's also a forum, contests, a blog, and some helpful articles and links. Check it out if you haven't already.

BurdaMode has some really cool patterns that I NEED to try. Click on Downloads to get there. They also offer suggestions for simply refashioning items you already have into the items in the pattern. Awesomeness abounds!

The glorious Queens over at Kingdom of Style have posted a few tutorials. Unfortunately, they're hard to find. So here they are linked: Tulip Hem, Cocoon Hem, Bubble Hem. Those are the only ones I saw; there might be more. Give me a holla if you find more and I'll add them here. Don't forget to check out their awesome fashion blog while you're there!

Get Creative! Conference Center has all sorts of crafting goodness tutorials and advice. It's more crafty and accessories, and less clothes, but it has a lot of information that I have yet to explore. I would say they could just a few extra pictures in the tutorials though, such as a picture of the finished project. Otherwise, check it out. Now.

Sewing.org has a lot of articles on sewing. Tips, tricks, techniques. It also has some cool projects to do. I'd say it's strength is crafty versus clothing. Click on fun projects; I really want to do the Dancing Diva project. Also, for the world concious among you, check out the charitable sewing projects. I might have to give one a go when I have more time.

that*darn*cat is a blog by a sewing and crafting mother with some cool projects for inspiration and some tutorials and explanations which might be useful. I bookmarked it for the quilted wallet tutorial.

13 Things You Can Make out of Your Old Blue Jeans. I think that's self explanitory. You should check out the rest of the blog too, if you're into thrift.

Martha Stewart, the DIY queen. Her emphasis is more on crafty, but she does have some cool clothing tutorials too, like this swimsuit, what to do with old bridesmaid dresses, and this flower hat.

One Hour Craft is a crafting blog which features quick and easy projects and inspiration. Love.

Super Eggplant has a simple tote bag tutorial. It's a great crafter's blog with plenty of eye candy.

Fitzpatterns offers free and low cost downloadable patterns. It's got some good stuff too. Scroll down and click on "free" for the free ones. I wanna make the cape!

Get Crafty! is a crafty DIY zone, with crafting-related articles and some tutorials. It also has some good articles on living cheaply. They also have a store, forum, and other things.

Costume Wardrobe has some cool projects for your costuming needs. I really want to make the cat ears, the petticoat, and the shoe covers! The instructions assume some knowledge of sewing. It's really more write ups of the costumes than full step by step tutorials.

Coats and Clark has, in their own words, "hundreds of free projects to knit, crochet, embroider, sew and quilt." It also has some fabulous sewing how tos with lovely diagrams.


Twinkly sleeping 2

If you need some help with sewing, you might take a look at these links.

About.com has some helpful articles on sewing techniques. All sorts of sewing related advice are there. Give it looksie if you're having trouble.

Expertvillage.com has some videos on sewing techniques and projects. I personally found them kind of boring. They basically say word for word what's in the articles, so I usually use the articles. You may find the videos more helpful than I do though, and occasionally I use the videos for the visual. Plus, I can listen to them while doing something else.

Simplicity.com also offers sewing help, tips, tricks, and advice. They also have some free patterns and projects online somewhere.

Sew, Mama, Sew! offers-- in their own words-- tips, contests, reviews and inspiration. You can also find some tutorials here, and a little sewing community.

Twinkly sleeping 3


If you're in need of inspiration, motivation, and perhaps some new friends to talk shop with, you might enjoy the following DIY Communities.

BurdaStyle has free patterns, many tutorials, and plenty of inspiration from it's fabulous members. It also has a handy-dandy sewpedia, a forum, a blog... Basically everything you need for sewing delight. They are more foucised on clothing then say crafting.

Threadbanger.com. If you don't know them you should. Weekly videos with project ideas for stuff you already have or can get cheap. They've also got a banging forum with even more project ideas and a place to show off your creations, get inspiration, and get help. Check them out. They're image is hip, fun, and thrifty. They alsosupport independent designers and eco and world friendly stuffs. Great for crafty, though an emphasis on wearable stuff.

Cosplay.com is a HUGE forum for cosplayers and those interested in it. Take some time to browse it for some amazing costumes. For this post, I'm mostly interested in 
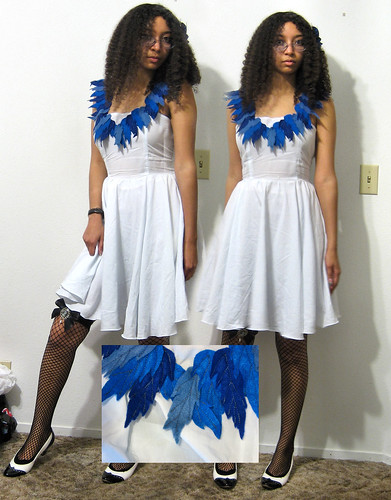
this link, which has a bunch of links to tutorials for various cosplay related things, which can also be used for other costumes or even everyday clothes. I really love the tutorial for feather wings and I hope to make it sometime. Unfortunately, many of the tutorials are in Japanese, which stinks since I can't read it. Hey! Maybe if I use the google page translater thing...

Craftster.org is a large forum for the crafters. It offers great resources for crafting and sewing clothing. It's the cosplay.com for crafters! Check it out for tutorials, advice, help, inspiration, and maybe some encouragement and companionship.

Tomoyo Hime

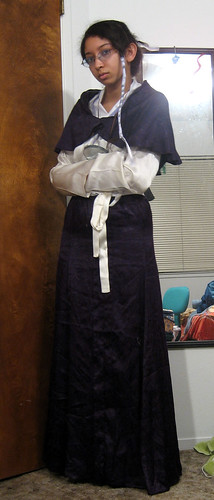
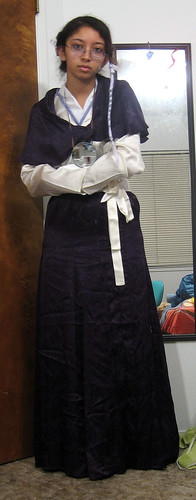
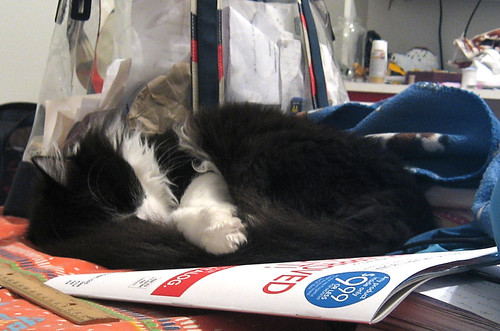
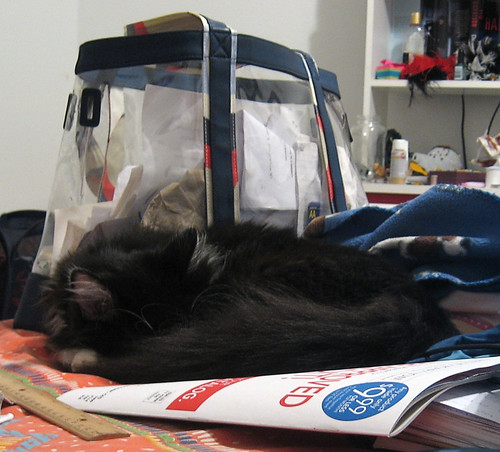
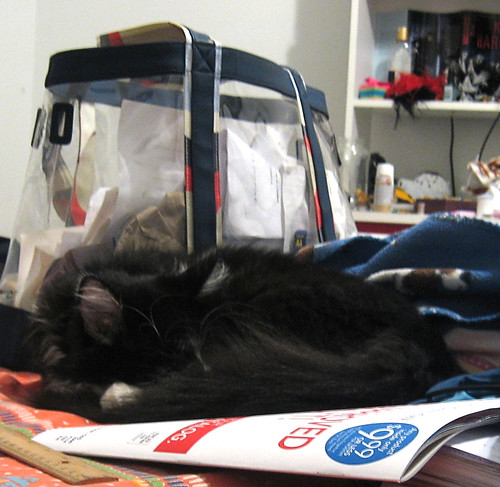
Me and Twinkle stayed up very late to write this post.

Twinkle sleeping 1

Be greatful, peons!

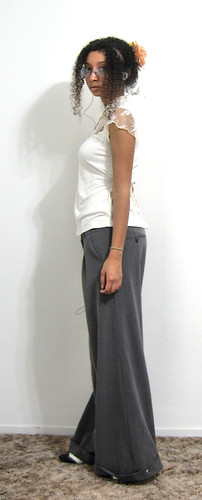
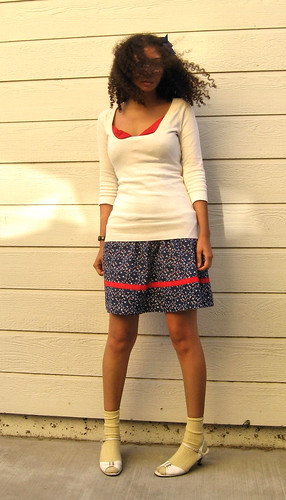
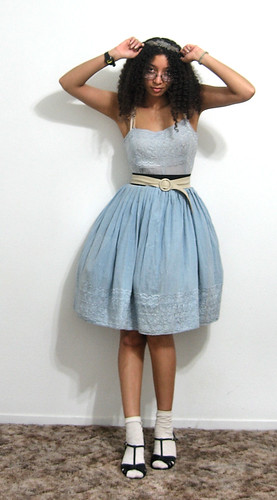
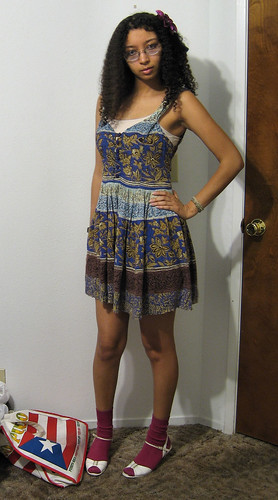
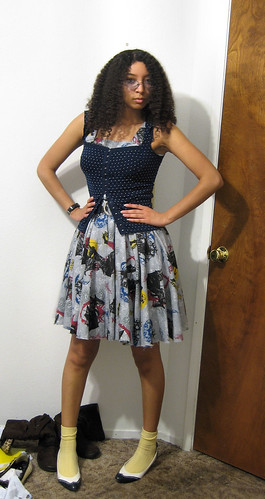
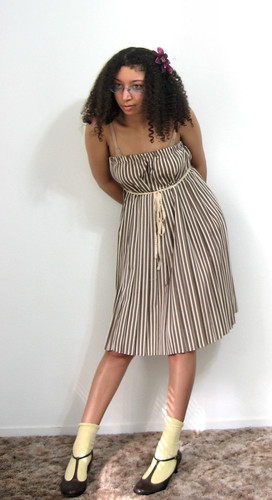
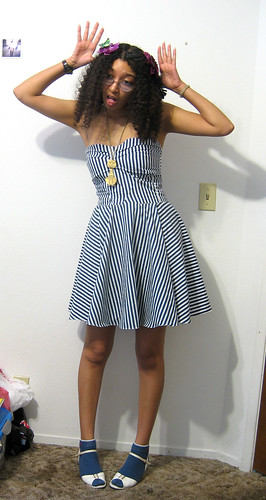
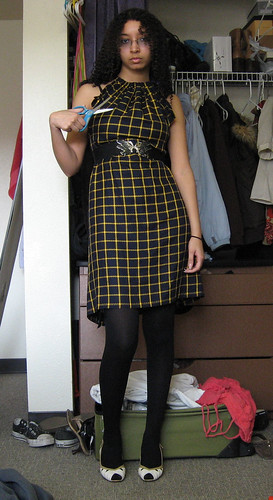
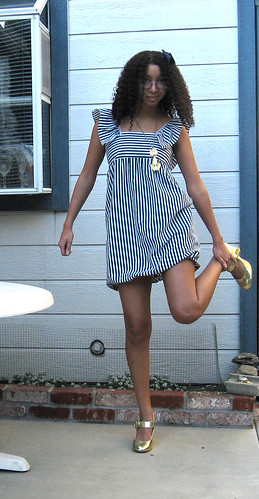
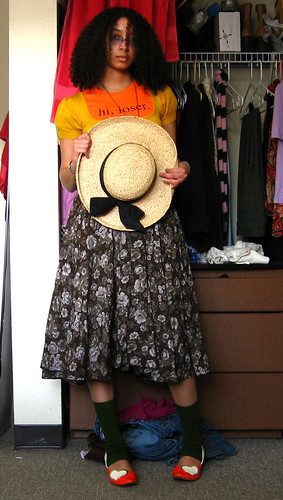
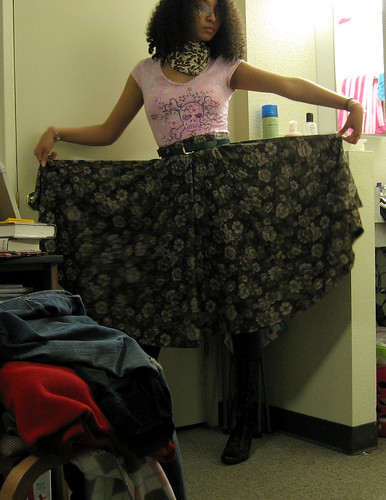
Pix: Click on the pic for more info, as always.

Tomyo Hime,

Ivy Frozen


Read more!

Tuesday, June 10, 2008

How to Successfully Alter Clothing pt3: Making the First Cut

Spider Lady

Making the first cut can be the toughest part of sewing. You never know if it will turn out right, and the fear that you will royally screw up sits there and stares at you. Cutting your pieces out is probably the most crucial part of sewing. If your pieces aren't cut properly, chances are your piece will end up wonky. But don't let the fear cripple you, o mortals, for most of the time you can find a way to work with your mistakes if you should happen to make one.

If you're new to diy and crafting, you might want to start with something simple or do a practice run on something that you won't be too depressed about if you mess up. it might also boost your confidence a bit.

Cork boards are good to cut on since you can stick your pins into it to hold fabric and patterns in place and it's hard enough to cut on. You can also stick pins in carpet but corkboard holds better and is a better surface to cut on.

Fold your fabric flat and iron it if necessary. Most patterns require pieces that need to be cut twice; save yourself work by cutting it once out of your folded fabric. This also ensures that you will have a left piece and a right piece.

If you don't have enough fabric for all the pieces if you cut them on the fabric while its folded, try opening the fabric up. This will give you a little more fabric to work with. When cutting out pieces that require two, cut the first piece, flip your pattern piece over, and then cut the second one. That is important so you will end up with one left piece and one right piece.

Good, sharp sewing shears are a big help. If you're having trouble cutting a straight line, you may find better scissors will help.

Don't have a pattern piece? Dissappearing ink pens and tailor's chalk are your friends. They're great for drawing the lines you want to cut when altering a piece. Be sure to read the directions and test it on your fabric. I find that the pencils don't really work so well, so don't be fooled by them. Get real tailer's chalk. If you don't want to invest a lot in sewing supplies, I do occasionally use one of my art pens that I know erases easily (it comes out on my fingers!) to draw cutting lines. You can also use a sharpy in places where the line won't really show on the outside, such as seam allowances and hems. I wouldn't recommend using sharpy on darts or on edges you don't plan to tuck in or otherwise finish. You can also just cut the sharpy lines off.

Don't forget to leave seam allowances. If you're making something shorter, make sure to leave enough fabric to finish your new hem. Most patterns use a 5/8" seam allowance. I use a half inch and a full inch for zipper seams. It gives me extra room to play with, and I find it easier to insert zippers with the larger seam. Occasionally, I use smaller seam allowances if I barely have enough fabric.

Cutting it close,
Ivy Frozen


Read more!

How to Successfully Alter Clothing pt2: Useful Things to Pick Up

seashore high maintenance
Before reading, see part 1: inspiration if you care.

So, you have an idea. But before you can implement it, you need to do some planning and pick up some supplies. I'll leave it to you to pick out you more project specific needs; I'm going to list useful items that are more general and you might not think about having around.
1. iron

An iron is a very good thing to have and use on your projects. Use it to iron your fabric before cutting, to iron seams, to set iron on adhesives, on your final product, etc. You can get by without an iron, but you'll be surprised by the difference an iron makes.

2. iron on adhesive or fabric glue


If you're not so good with the needle and thread, iron on adhesives and fabric glue are great alternatives to explore. They're also great tool if you can handle your needle and thread. Use it to hold fabric in place while you sew, make your own appliques, and a dozen other uses I'm sure you can come up with. I like to keep some iron on adhesive tape in my sewing kit, though I also keep a sheet or two on hand for appliques.


Also, if you plan on button holes, iron on interfacing is a good idea. It will keep your button holes from stretching, making them look nice and work better. It's also a good idea to help reinforce waist bands and support zippers on light fabrics.

3. straight pins


If you plan on doing a bit of diy, get yourself a pack of straight pins. They're cheap and very worth it. Safety pins, though I love them, are no substitute. Get the longer ones; they stay in the fabric better. Plus, you can use the straight pins to pin your fabric into your carpet or corkboard, which may come in handy for you later.

4. thread

Dollar store thread sucks. Get yourself some good quality thread. It may seem like it costs a lot, but good quality thread is sturdier (& therefore will last longer), looks nicer, and is not wrapped in a retarded style that makes it impossible to use on a sewing machine and annoying to handsew with. Also, get the big spool of thread, at least a 100 yds. You'd be surprised how quickly thread goes, especially if you use a sewing machine.

Selecting a Color: It's hard to match fabric colors to your fabric sometimes. I find that a thread that is a little darker than your fabric won't be as noticible and prominent as thread that is lighter. When you can't find a color even mildly close to your fabric, try selecting a color that just looks nice with your fabric. Also remember thread color doesn't really matter that much in most cases since it isn't visible on the outside. If you're still learning and prone to messing up, you might want to use a contrasting color in non-visible places. It makes picking on your foul stitches much easier.

5. needles

There is a reason for all the different sized needles. if you're using a sewing machine, make sure you have the proper needle for your fabric, especially if your fabric is really heavy or light. If you're hand sewing, the needles are different sizes for functionality. If you buy a pack of hand needles, they usually say what the different needles are for on the back of the package.

On this note, if you're using a sewing machine, make sure you have the right feet and the right needles for your project. The information you need should be in your sewing machine manuel.

6. Seam Ripper

It's my favorite tool. It's so useful when you mess up and need to rip out stitches, moving stitches when altering an item, and it just generally looks cool and hardcore in your sewing kit. They cost like a dollar and are totally worth it. Beware though; they're very sharp and you can stab yourself with them.

7. sewing shears

While they don't necessarily have to be sewing scissors, a good pair of sharp, strong shears could make all the difference in cutting a straight line, and a wierd, choppy line. If you're having trouble cutting you're fabric, buying a new pair of shears might help. Dollar store sewing scissors seem to be decent, but they also seem not to last for lengthy periods. The rotary cutters work even better at helping you get a straight line, but the sets are also kind of expensive.


Alright, that's all I can think of. Wonder around your local sewing store and investigate. You'll find cool embellishments you can use and maybe some products you didn't know were available. (Grommets and hooks & eyes come on tapes!)

The dress on this post was made from a twinsize fitted sheet. The bubble hem and straps are formed from the stretchy portions on the ends. Really sweet and simple. Click on the image for more info.

Arrives precisely when she means to plus 15 minutes,
Ivy Frozen

Read more!

How to Successfully Alter Clothing pt1

Family Circle

I love making my clothes unique and how I want them. And in sharing my creations, I've come aross many people who admire my work, but are too afraid to go after their own wardrobes. Thus, I figured I'd do a few posts to reveal how truly easy it really is to alter clothing to make it your own.

In this, the first part, I'll be covering the first step and sometimes the hardest: figuring out what to do to the item of clothing.
Figure out what you like about the piece. What attracted you to the piece in the first place? Perhaps you just liked the color or pattern and nothing else. Maybe you're a sucker for ruffles like I am. Or maybe it was all about the lace. Figure out what you like about the item so you can figure out what you want to keep.

Figure out what you don't like. Is it too long or too short? Is it horribly unflattering on you and can you pinpoint why? Are you not feeling the pleats? Is it too plain or WAY too much fun? Figure out what you don't like in the item to figure out what NEEDS to be changed.

Figure out your style. Take a look in your closet and note the items you wear most frequently and why you wear those items so much. Also note your favorite items in your closet and why you liek them. Perhaps you keep a StyleDiary or post to other street fashion communities like Wardrobe Remix or Stylemob. If so, check out your outfits there. Find your favorites and take a look at what you wear. Figure out your style so you can make sure your new item fits into it.

Find examples and inspiration. Street style sites, fashion blogs, fashion magazines, phtography books, and diy sites and books are all great places for inspiration. I really like Wardrobe Remix, street style blogs, and fashion blogs from around the world for inspiration. I also love looking at costumes and antigue clothing. Etsy, craftster.org, and Threadbanger are places where crafty people gather and share (or sell) and thus are rich beds of inspiration. Stores, the runways, and art can all inspire you and help you know what you want to do.

Check out my list of DIY Links for some more inspiration and help with your DIY needs. Also check out my sidebar, which I need to update, for more inspiration and help.

In these posts I'll also include some of the stuff I made but haven't done a formal write up of yet.

This skirt,
Rainy Day
also in the outfit at the top of this page, became

this dress:

Flower Power

with some scissors, thread, red ribbon, and two white buttons. Look out for a formal tutorial (with photos!) or maybe video when I make another one. That might have to wait until January though. It's really quick and easy though. Just take a maxi circle or a-line skirt, cut off the waistband. Cut the waistband at the point oppossite to where the closure is (or anywhere you'd like). To make the waistband bigger to fit your chest, simply add ribbon or a strip of fabric to the waistband. If the waistband is already big enough, you can cut out a portaion and replace it with ribbon or fabric. Sew the waistband back on the skirt. Use some more ribbon (I sewed two strips of ribbon together, side by side) to create straps. If you want, you can create button holes on your straps, but I simply attached the straps to the dress and sewed the big white buttons on for show. And voila! You have a sweet pinafore tent dress, which is perfect for the summer and with layering for the winter.

images: click on the images in this post to be taken to it's flickr page, where more sizes, outfit deets, and further info is available.

doin it herself,
Ivy Frozen

Read more!

Friday, June 6, 2008

Mission Statement

Hello all and welcome to my new space. Some of you may be familiar with my old blog, If the Iceberg, but I wanted a new name, a new look, and a new place so I moved here. What do you think of my new place? I'd love to hear.

I figured I should inaugragate this blog with a mission statement of sorts so press the read more link if you'd like to read it.

This blog will focus on diy, style, and fashion much like my other blog. It'll include inspiration from other sources, such as paintings, movies, and music. They'll also be posts on my soon to open etsy shop. We don't like to limit ourselves too much here at Ivy Frozen Productions, and hopefully we'll keep you all as interested and entertained as we are. And by "we" I mean me plus my imaginary sweatshop--erg--unionized elf pals who help me sew and bring this blog to you.

My comment policy is constructive critisism, kudos, and relevant comments welcome. Spam and insults will be turned away at the door. Let's keep this a positive place, hmmm? There's enough negativity in the world.

Fresh and clean,
Ivy Frozen

Read more!